While a garage is nice, I like a workshop even better. And by “workshop,” I’m referring to a garage or outbuilding that’s a little more dressed up in regard to tool storage and organization. I consider a garage a workshop once it has a variety of shelves, tool racks and work surfaces arranged in some sort of logical order. The place doesn’t have to be meticulous, but with home-improvement projects an organized workshop paves the way for greater productivity and less time spent searching for tools. Here’s how we dressed up a freestanding garage into a home-improvement workshop.
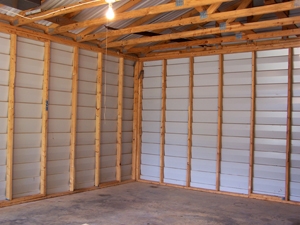
Wall Prep When converting the freestanding 24-by-24-square-foot garage shown in this article, we were fortunate to begin with a strong foundation. The garage was built on a concrete slab, framed with studs on 24-inch centers and sheathed in metal siding and roofing. The front wall features two automatic garage doors. We swept away the dirt and insect nests from the floor and rafters and then focused on the remaining three walls.

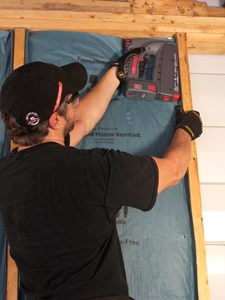
The EHT staff plans to use this workshop extensively throughout the summer and winter, and since we had easy access to the open stud cavities we decided to add fiberglass insulation batts. We used the mold- and mildew-resistant variety, because it never hurts to be too careful. The batts are pre-sized to fit between the 24 o.c. studs, so installation was as simple as stapling the paper nailing flanges on each side of the batt approximately every 8 inches to the inside of the studs. Nailing the 1-inch flange to the inside of the studs, as opposed to the face, creates an air gap that aids insulation, and it helps to avoid nail pops when installing any sort of wallboard. A cordless electric nailer from Arrow Fastener Company greatly quickened our pace when stapling the batts (www.arrowfastener.com).
Occasionally we cut extra strips of insulation to fill gaps at the bottom of the framing. When cutting, place the batt over plywood, compress the insulation and use a long razor knife to slice the material in a single stroke. A T-square makes a good cutting guide. Always wear gloves, eye protection and a dust mask when working with fiberglass.

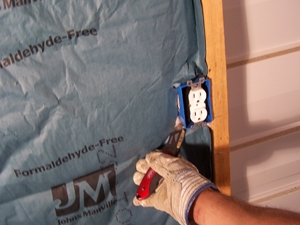
Ultimately we were planning to add a slat-wall storage system with adjustable shelves and tool holders. However, to avoid deflection in the slat-wall panels, we first installed 1/4-inch plywood panels over the studs. The panels were installed with 1-1/4-inch drywall screws roughly every 16 inches. You can saw the panels to size so they break on stud centers, providing a solid fastening surface behind the panel edges. Or you can add blocking between the studs to create a solid nailing surface when the panel edges extend beyond the studs.
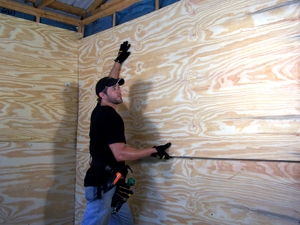
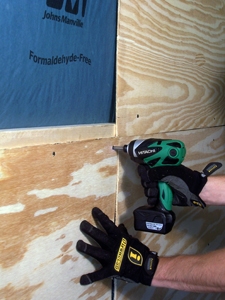
A big help when fastening the plywood came from Hitachi’s new WH10DL 10.8V Lithium Ion Impact Driver. This powerful miniature driver provides 930 inch/pounds of torque, which makes it ideal for heavy-duty jobs that require lots of power. It easily outperformed my 18-volt drill/driver when driving the many drywall screws. At only 2 pounds and 5-1/2 inches, the mini driver is easy to lift for overhead work and fits easily into a tool belt. It gets into tight work spaces and features an LED to illuminate dim areas.
Another help came from my good friend, Mitch. I put up half the panels alone, but the work sped up dramatically once I convinced a buddy to help me lift and install them.
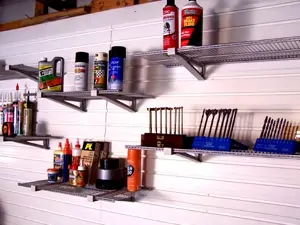
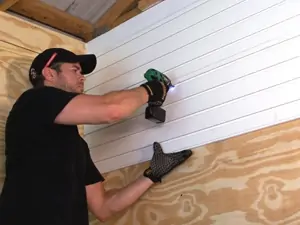
Slat-Wall System The wall-mounted storage system we chose is called the Flow Wall System, a fully integrated and expandable slat-wall system that combines a large assortment of storage devices and accessories (www.flowwall.com). Available in 1-by-4- and 1-by-8-foot sizes, the panels are strong and durable, and easy to install. The available accessories include application-specific hooks, shelves, bins and cabinets that attach to the Flow Wall panels with a simple click-together system that requires no tools. Also available are strap attachments for storing cords and hoses. The mounting plates of each accessory can be moved and rearranged at any time.
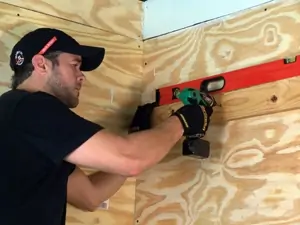
To install the wall system, begin with a clean wall and use a stud finder to locate and mark the studs. Level and fasten a scrap piece of wood to the wall just below the position of your first panel. Rest your first panel on top of the scrap board serving as your guide, and drive your first installation screw through the slat-wall panel and into the stud behind it. Use a T-square to map out the stud locations on the panels. Work your way up and across the studs, fastening the panels between the slats.

To extend the wall vertically, just align the next Flow Wall panel above or below the first, pressing it evenly for a seamless connection, and then screw down the panel securely.
To extend the wall horizontally, insert the provided nylon pin connectors into the pin slots on the side of the panel. Gently push the panels together so the pins slide into the slots on both panels. Then simply fasten the new panel to the wall.
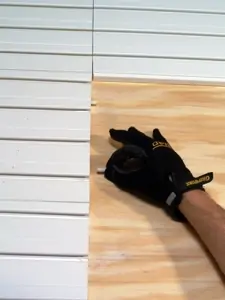
To cut the panels to size, we used a table saw fitted with a fine-tooth blade, and used an outfeed roller to support the work. However, you can also use a handheld circular saw, but to do so you should support the panels from below to prevent deflection when cutting, and use a straight-edge guide to keep the cut in line.
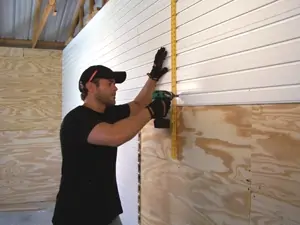
For this workshop, we covered the rear wall extensively with the Flow Wall System, and then ran a couple of tracks along each side wall. Available in three colors, white, maple and silver, the number and orientation of the storage panels is totally up to the homeowner and can be easily rearranged. The same goes for the many storage accessories, from wire shelves to ladder racks. Our staff fell in love with the Flow Wall System.