

I’ve learned a lot since becoming a dad 6 years ago, like those timeless life-lessons you see in the movies. But I’ve also learned something else, maybe a little more mundane, but with no less effect on my everyday existence—kids have lots of stuff! And, this brings me to another point: So do we.
It’s overwhelming and it all needs to go somewhere. If you have an old house like mine, then it’s a double whammy because the toaster-oven-sized closets in old homes don’t leave much space. The same thing applies if you have a closet-less mud room, use a garage entrance, or even a foyer—there’s no place to put anything.
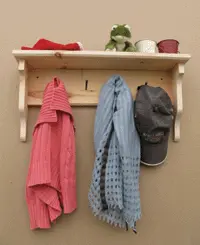
The result, of course, is that coats get piled where they shouldn’t, backpacks are loaded on the floor, and all the other hats, mittens and kid-related stuff that comes through the door lives in an unseemly pile.
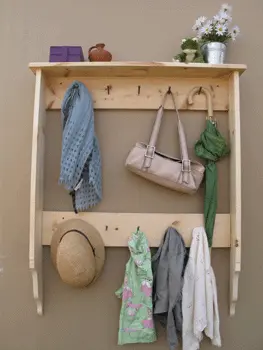
To that end, I built the Original Kid’s Cubby for my mud room some years ago (scroll down for Side Note) and it has been piled high with kid stuff ever since. Lately, however, it is my daughter’s room that’s gaining critical mass, and she needs more space to store her stuff. Enter the Deluxe Kid’s Cubby.
It’s got two levels for storage, it fits snug to the wall, and it looks pretty cool. I made this one out of 1-by-6 No. 2 pine boards in an afternoon and finished it with boiled linseed oil. Of course, you could also paint it for a different look. (I’d use Select Pine or Poplar for paint; the knots in No. 2 stock will bleed through the paint.) Assembly is pretty straightforward, and there’s some fun scroll work and routing to keep your tools in condition.
One more thing: The piece here is 40 inches tall and 34 inches wide, because I sized it for the space it’ll live in. Of course, the design is scaleable so you can make either cubby to the dimensions that work best for you and your kids.
Cut List
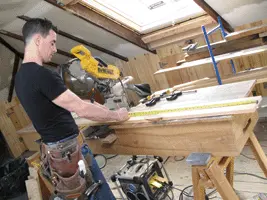
This is one of those projects where you can cut everything ahead of time without too much worry. Everything is made from 1×6.
• Top: 34 inches
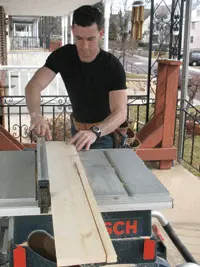
• Sides: 40 inches—rip to 4-1/2 inches wide
on table saw
• Bottom Shelf: 30-1/2 inches—rip to
4-1/2 inches wide on table saw
• Backers: 30-1/2 inches
Layout
Design Tips. One of the keys to making workbench projects like this is using design to keep some of the edges from lining up and to make the unit look proportional. In other words, make the top wider than the sides and the sides thinner than the top. This gives the unit a little direction as it grows up the wall. Add a scroll detail at the bottom for a gentle effect that sweeps the lines gracefully toward the floor at the bottom.
Scroll cuts, Routing, Sanding
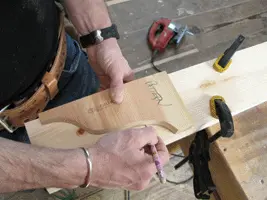
Making scroll cuts. The trickiest part of this whole thing is making the scroll cuts. What I like to do is draw (free-hand) a scroll pattern out on a piece of stock and get a shape I like. Then (after a few tries to get it right) cut it out with the jigsaw. The next thing to do is sand it just right so you can use it as a pattern piece for the actual shelf sides.
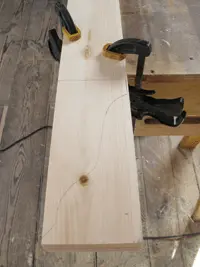
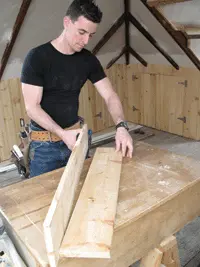
Once you have the pattern cut, clamp both sides to a sturdy work table. Before squeezing the clamps tight, make sure the sides are flush on all edges. Cut the scroll pattern using a jigsaw.
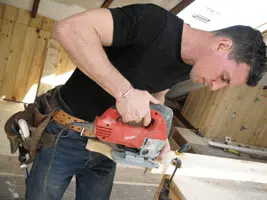
Tool Tip: Some people—myself included—force their jigsaws around turns. This creates jagged saw marks and causes the blade to sway or bend. I’ve found that easing the saw into the work makes for a better cut. The key to working your way around the scroll is to enter the cut from various directions (sort of like cutting a cope), so the blade meets the line going in approximately the same direction.
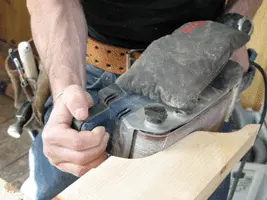
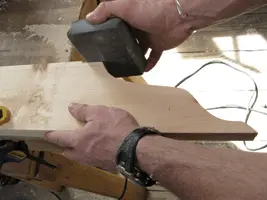
Sanding scroll cuts. I’m pretty sure you won’t find this technique in any manuals for belt sanders, but since I don’t have a spindle sander, I make due. Gently and carefully, I use the roller on my belt sander like a spindle sander and walk it the length of my scroll until it’s smooth — like butta! Because I’ve left the pieces clamped together, they come out the same, and I do half the work. Run the sander on low speed to keep it from jumping.
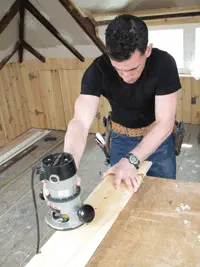
Routing. If you’re going to rout an edge on the top, now’s the time. Have at it.
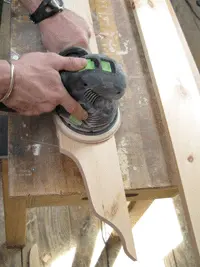
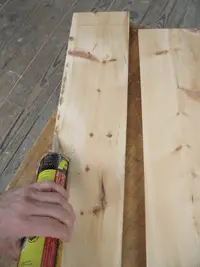
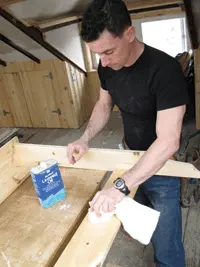
Finish Sanding. If you intend to sand all the parts of your Deluxe Kid’s Cubby, its way easier to do it now than once it’s assembled. A random orbit sander will really tune up any marred wood and bring up the grain to accept finish well.
Assembly and Installation
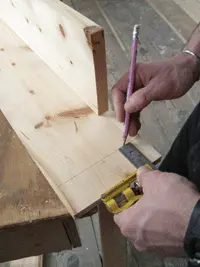
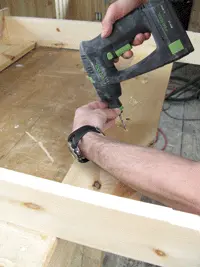
Top and Backer. My cubby worked nicely with the top overhanging the sides by 1-inch on each side. So, at 1-3/4 inch inward from the edge of each side I made a light square line across the bottom of the top-piece. This indicates the location of the backers and gives me a square line to use when I apply the sides. With the lines drawn, fasten the top to the backer.
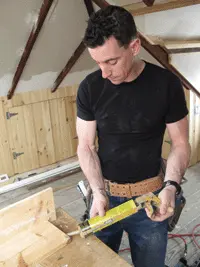
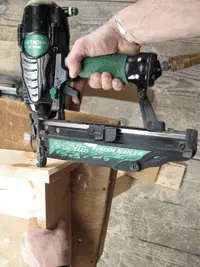
Tool Tip: “A little dab will do ya’” applies to glue as much as it does to hair cream. I like to glue and nail this project. A finish nailer works great here for quick fastening, but screws also work just fine.
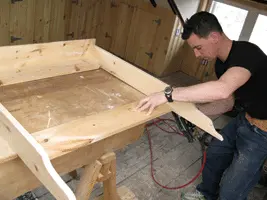
Sides. Installing the sides does two things for this project: First, it gets the sides on (handy how that works); but second, installing them tightly to the top and backer squares everything up, so you get a nice, snug fit. Wipe away any glue that squeezes out as you go.
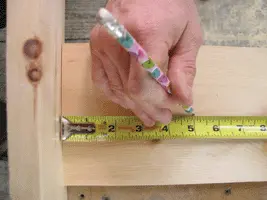
Bottom Backer and Bottom Shelf. Installing the top of the bottom backer 12 inches up from the end of the scroll cut worked nicely for this project. Make a mark on each side and square a light line across. Install the bottom backer by popping three nails through each side.
Design Option: Install a shelf on top of the bottom backer. Fasten through the sides and down into the bottom backer.
“Hooks.” The hooks on my kid’s cubby are hard-cut nails, which are easy to install, stay put, and give it a colonial look. Laying them out on a center line along each backer about 5 inches apart worked nicely. I then pre-drilled each hole on a slight upward angle (clothes and things hang better when the nail is tipped up a little) and then tapped in each nail. Be careful not to drive the nail through the rear face of the backer.
Installation. Installation is pretty easy. Mark the location you want the piece on the wall, then locate studs. Next, strike a level line. Place the piece on the wall and fasten with trim-drive screws. Make sure to catch studs. I used trim-drive deck screws with painted heads that masked the fastener somewhat.
Editor’s Note: Mark Clement is author of The Carpenter’s Notebook and Kid’s Carpenter’s Workbook, Fun Family Projects! Visit www.TheCarpentersNotebook.com.
SIDE NOTE
The Original Kid’s Cubby
The Original Kid’s Cubby is much smaller than the deluxe version. While the first Kid’s Cubby’s I made are wall-mounted in my mud room, the Deluxe version I made here finds its home on the back of my daughter’s bedroom door. I also added some small details you can use on any kid’s cubby:
Instead of putting the routed edge on the top of the shelf, I flipped it over and put it on the bottom. And, once assembled, I routed a chamfer along the bottom edge of the backer to add some shadow lines. Hollywood isn’t going to call me to design any sets because I did that, but it brings some nice detail and was fun to make.
Hollywood is more about the stories our kids bring to us, anyway, and the life lessons that change us for the better.

