

A do-it-yourself storage solution to keep your tools secure.
With the popularity of cordless power tools, it’s extremely easy these days to accumulate a lot of portable tools, and when you add in quality corded tools, such as circular saws, routers, planers and air nailers, you can end up with a pretty hefty investment. These same tools are the first to “walk away” in a theft. Left lying around a shop or garage, they can also be somewhat dangerous for youngsters.
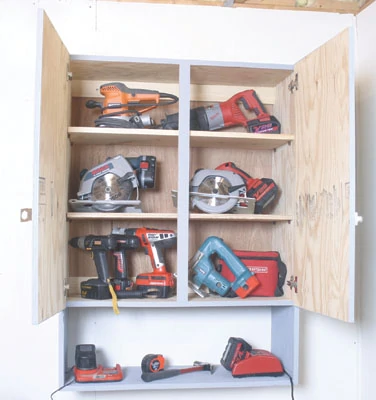
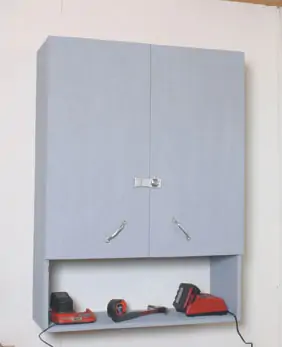
A locking cabinet not only provides a secure place, but protects the tools as well. The cabinet shown is made of 3/4-inch plywood and has an open shelf below the locking cabinet for chargers for cordless tools, or for less valuable gear. The cabinet shown is to be used in a garage and the plywood is economical “good one-side” (C/D) fir plywood. You may prefer to utilize a pine, birch or other more decorative plywood if your shop or garage is more upscale.
Building the Case
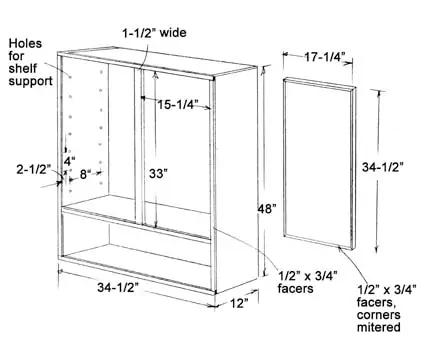
First step is to rip the sides, bottom and top pieces to the correct width. Then cut the rabbets in their inside back edges for a 1/4-inch plywood back. The shelves are held in place on shelf pins inserted in holes bored in the sides. This allows for a more versatile cabinet in case you desire to add or eliminate shelves, or adjust their heights.
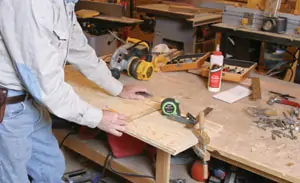
Use a combination square to mark a line two-inches from each outside edge of the sides, and then mark the shelf pin-hole locations. Bore the shelf holes only 3/8-inch deep, using a forstner bit in a drill press with the bit set at that depth. Or you can use a stop guide on a cordless drill, or simply wrap a piece of tape around the drill bit as a “stop” mark. Or, you may prefer to use shelf strips with snap-in shelf holders. These are quickly and easily installed.
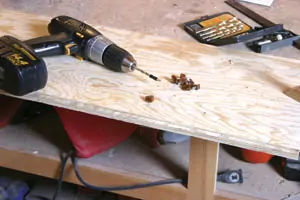
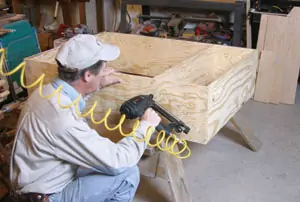
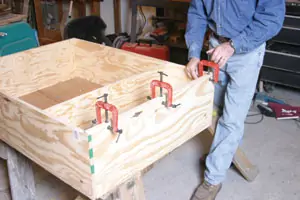
With the sides prepared for shelves, assemble the case on a smooth, flat surface. Use glue and self-starting screws, an air nailer or No 6. finish nails. The case should be assembled with the back facing up. Note the bottom ends of the sides extend below the case bottom to provide for the open shelf. Use a carpenter’s square to make sure the case is square. Cut the 1/4-inch plywood back and install it in the squared case using glue and screws into the sides, top and bottom rabbets. Cut the bottom shelf board to width and length and install it between the bottom ends of the sides.
Support cleats are used to anchor the cabinet securely to the wall. Cut the support cleats for the inside of the case, one at the top and one at the bottom. Install these between the sides and against the top and bottom boards. Use glue and screws driven from the top and bottom boards into the cleats.
Door and Facers
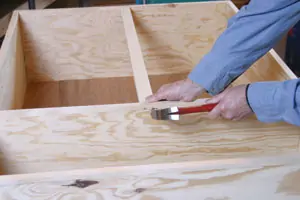
Turn the case over and rip the top facer to width from solid pine 1-by material. The facers are 1/2-inch thick to create the Euro-style cabinet. Cut to length and install the top facer piece. Use glue and No. 6 finish nails with the heads set below the wood surface. Fasten the bottom shelf facer board in place in the same manner. Next install the side facers, keeping their outside edges flush with the outside edges of the sides. Then install the bottom case facer between the two side facers, keeping its top edge flush with the bottom top edge. Or you can use edge banding to cover the plywood edges. Install the center divider facer between the top and bottom facers. Use glue and self-starting wood screws driven through the top and bottom facers into the ends of the center divider facer. Fill all nail holes with wood putty and sand the entire case smooth.
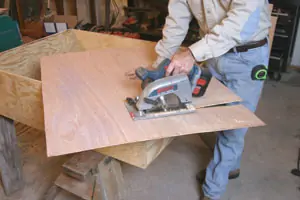
Cut the doors to size from 3/4-inch plywood. Note the doors are “Euro” or full overlay style. The doors also overlay the center divider, providing a means of locking the doors together. The plywood edges are finished off with edge banding, which can be done in one of two ways. You can purchase ready-made edge banding and glue it in place, or you can cut thin wooden strips (1/2-inch thick and 3/4-inch wide) and miter their corners, gluing these in place in the same manner as for the cabinet front edges. Sand the door fronts and edge facing smooth.
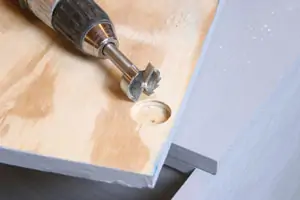
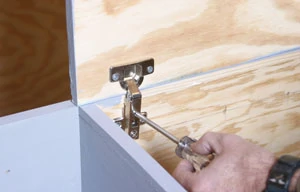
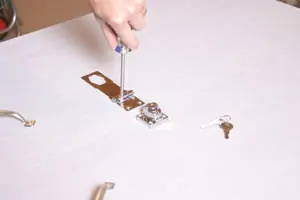
Apply the finish desired at this time. Then install the doors using Euro-style hinges. Drill the holes for the locks and install them as well. Add door pulls to the bottom corners. Hang the finished cabinet on the wall in the desired location using self-starting 3-inch wood screws through the support cleats and into the wall studs.
Load up the cabinet and lock it tightly.
Materials
- Sides, 3/4” plywood, 11-1/2 x 48”, 2 req’d.
- Top, 3/4” plywood, 11-1/2 x 33”, 1 req’d.
- Bottom shelf, 3/4” plywood, 11-1/2 x 33”, 1 req’d.
- Case bottom, 3/4” plywood, 11-1/2 x 33”, 1 req’d.
- Case back, 1/4” plywood, 33-1/2 x 33-1/2”, 1 req’d.
- Support Cleats, 3/4 x 2 x 33”, 2 req’d.
- Top facer, 3/4 x 1/2 x 34-1/2”, 1 req’d.
- Bottom shelf facer, 3/4 x 1/2 x 33”, 1 req’d.
- Side facers, 3/4 x 1/2 x 46 1/2”, 2 req’d.
- Bottom case facer, 3/4 x 1/2 x 34-1/2”, 1 req’d.
- Center divider facer, 3/4 x 1-1/2 x 33”, 1 req’d.
- Doors, 3/4” plywood, 16-1/4” x 33-1/2”, 2 req’d.
- Door Edge Banding, 1/2 x 3/4 x 17-1/4”, 4 req’d.
- Door Edge Banding, 1/2 x 3/4 x 34-1/2”, 4 req’d.
- Shelves, 3/4 x 10 x 32-1/2”, cut to fit, 3 req’d.
- Shelf Pins, 12 req’d.
- Hinges, 2 sets req’d.
- Lock, 1 req’d.
- Door pulls, 2 req’d.
