


Summertime means hot temperatures and even hotter houses. Many homes, particularly those with western exposures and little shade, absorb the sun’s heat during the summer months and heat up like an oven on high.
If you are not in a position to dole out a few thousand dollars for a central air conditioning unit, and are looking for an efficient, inexpensive way to cool your house to a comfortable temperature, try installing a whole house fan. With just a minimal investment, your house could be on its way to cooling its air temperature without taking a bite out of your wallet.
What is a Whole House Fan?
Quite simply, a whole house fan cools a structure by pushing hot air out through attic vents and drawing cooler, fresh air inside through open doors and windows. The fan cools a house by using the temperature difference between the inside and outside air, and can never make the temperature lower than that of the outside air. This means you should only run the whole house fan when the temperature outside is lower than the house’s inside temperature. Nights and early morning are the best times to run the fan and lower the overall temperature in your home. (Note: Adequate attic ventilation is required for a whole house fan to work efficiently. See Side Note at bottom for more information.)
Install the Fan
The first step in installing a whole house fan is to select a unit that has the proper cfm (cubic feet of air per minute) rating for the size of your house. Available units range from 1,000- to 3,000-square-foot capacity. For our 2,100-square-foot project house we selected the HV 1600 Gold R from Tamarack Technologies. The model has two operational speeds and enough power to efficiently change all the air in a 3,000-square-foot house in about 20 minutes. The unit is quiet, easy to operate, features a built-in insulation system for winter months, and comes with everything you’ll need for installation, including the fan, grille and radio frequency remote control.
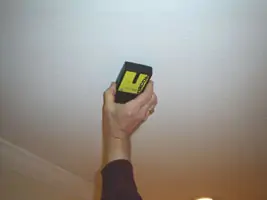
Locate the ceiling rafters.
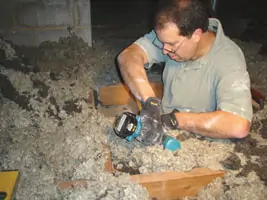
Target the installation of the fan near the center of the house. This will allow the air to take a path of least resistance up and out of the structure. In the approximate area where you want the fan installed, use a stud finder to locate the ceiling rafters. Mark with tape the two rafters between which the fan will lie. Go into the attic to find the area where the fan will sit and make sure there is enough room for the fan doors to open upward during operation, and that no pipes, wires or ducts are running through the space. Remove the insulation from the area so that you will have a clear area in which to work.

Make a pilot hole.
After you select the location, either cut a pilot hole in the ceiling and then cut sideways to the rafters, or create a cardboard template of the fan and trace the outline onto the ceiling before cutting. Either way, you need the hole to be no greater than 23-1/2-by-14 inches, so that the fan can rest comfortably on the rafters. The HV 1600 fits either in 16- or 24-inch-on-center joists.
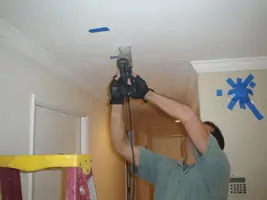
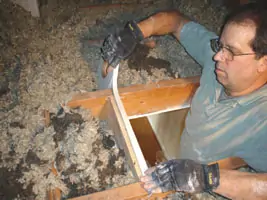
Cut an opening to the rafters.
Build a Box
After you cut the hole, add two pieces of framing between the rafters to form a “box.” Cut the 2-by stock of the same dimension as the existing rafters. We used 2-by-6 to create our box, and painted it white before installing the grille so that it would have a more finished look and blend in with the color of the ceiling. You can also paint the rafters before installing the fan because they will also be visible through the fan’s grille.
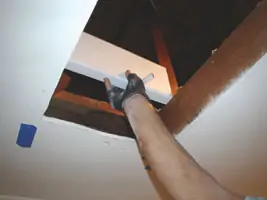
Frame a “box.”
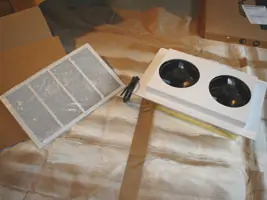
Shown are the fan components.
Secure the new framing to the rafters.
Now that the box is assembled, install a foam gasket on top of the rafters and added framing. Tamarack supplied the foam, but if your ceiling is spaced away from the rafters, then you will need to close any gaps with foam sealant before final installation of the fan.
At this point of the job, it’s a good time to bring a second person in to help. Raise the whole house fan up through the hole in the ceiling and set it onto the top of the gasket. The lower housing fits into the “box,” and the mounting flanges overlap the framing. It should slip down easily onto the top of the rafters.
Install the foam gasket.
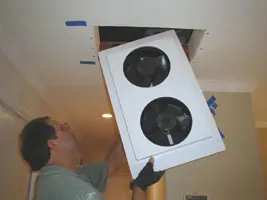
Install the fan.
With the fan in place, secure the unit to the rafters with screws. Connect the fan to the electrical power, following all electrical instructions that come with the unit; use a licensed electrician if you are not comfortable handling this process.
Even though the fan came with a remote control, it can also be hard-wired to wall switches. We chose this option and connected the fan to a three-switch wall unit that controls the fan’s power, high/low speed, and the motorized louver in the attic that increases our ventilation area (see Side Note at bottom).
The final step of the installation is to attach the grille to the ceiling. The grille is longer than the fan, so it completely covers the opening in the ceiling. Screw the grille to the ceiling and joists, and touch up with any putty or paint to complete the job.
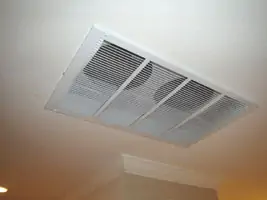
Install the grille.
SIDE NOTE
Proper Ventilation Needed for Peak Performance
One important component of the whole house fan system is proper ventilation in the attic space. Since the vents allow the hot air to be forced out of the house, too little ventilation space will prevent the hot air from leaving the attic.
The HV 1600 Gold R requires the equivalent of 3-1/2 square feet of unobstructed opening, or net free area (NFA), to operate effectively. This can be a combination of ridge vents, gable, end vents or other attic exhaust points.
To find out the exhaust space in your attic, add up all the square footage of exhaust space, and then deduct if there are insect screens or louvers over the vents.
According to Tamarack, if your home has vents that are 12-by-12 inches (1 square foot) in overall size, you would not actually be getting 1 square foot of ventilation area. The framework of the vent and especially the insect screening in it reduces the overall amount of area that the air can actually pass through—sometimes by as much as half.
For that reason, all types of attic vents are rated in net free area (NFA), which is the actual amount of open ventilation area that the vent contains after deducting out all of the space taken up by the frame and the screening.
“We recommend that a homeowner add some venting in the attic if there is any doubt about the free space available,” says Kate Raymer, director of marketing at Tamarack Technologies. “The fan will work more efficiently and will also, by convection, reduce the attic temperature as you draw air from the living space, because the hottest air is always accumulating in the attic during warm weather.”
When we measured our ridge vents, and subtracted out the screens, we had a little less than 2.7 square feet of ventilation—not enough to make the HV 1600 work to its maximum capabilities. Because we did not want an open louver in the attic, we decided a motorized shutter would be perfect; it could open when the fan is turned on, and close when not in use.
We found a motorized wall shutter at Grainger that provided an additional 4 square feet of exhaust space. We installed the shutter on the outside wall of the attic. To install the shutter, we cut a hole through the siding, built a frame that attached to the home’s framing, and mounted the shutter on the house. After connecting the shutter motor (which controls the opening and closing of the louvers) to the electrical system, we placed chicken wire behind the frame to keep birds and small animals out of the attic when the shutter is open.
The shutter is hard-wired to the whole house fan electrical switches, so it opens when the fan is turned on and provides plenty of additional ventilation space in the attic.
“By having the attic venting spaced throughout your attic—and putting in the additional spaces as recommended to get the peak performance—you will get the air moving all through the attic and not directed to one opening,” says Raymer.
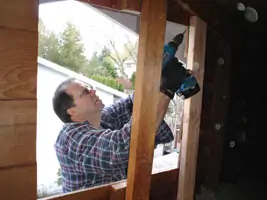
Framing the shuttered vent
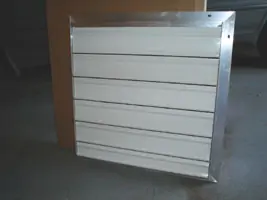
Right out of the box…
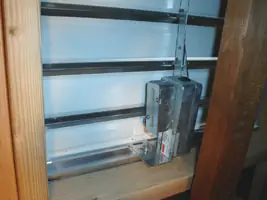
Shutter motor…
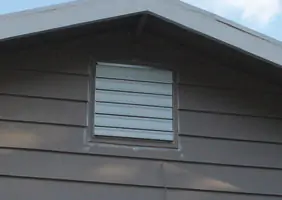
Vent installation completed
