

Choosing a new floor material is not as easy as it sounds—especially for a kitchen. The floor must look good, be low maintenance and stand the test of time.
Today’s choices range from traditional hardwoods to laminate to stone to ceramic tile. But another popular choice among homeowners is bamboo.
Homeowners are drawn to bamboo flooring because of its beauty and its durability—bamboo actually has higher strength properties than oak. Often characterized as an exotic wood, bamboo is actually a grass that is the fastest-growing plant on the planet. It can regenerate itself without replanting and will reach its mature height in just a few years.
Installing a bamboo floor over a wooden subfloor is an easy weekend project. The steps to installing a bamboo floor are the same as any other hardwood, and the results are fabulous. That’s why we went with bamboo when we replaced an old, white laminate kitchen floor.
Here’s how we installed our bamboo floor:
Order the Product
Bamboo flooring is available through importers such as Smith & Fong, manufacturers of the Plyboo brand that we used in the project. The material we chose was pre-finished, tongue-and-groove bamboo with a horizontal pattern that was ready to go right out of the box. Be sure to order more flooring than you think you’ll need in case any material is damaged during installation.
Let the Product Acclimate
Three days before starting the project, move the bamboo material to or near the area where it will be installed. This allows the flooring to acclimate to the room’s temperature and humidity. Keep the material off concrete floors and away from outside walls during this time. If space is an issue, stack the planks in alternating perpendicular layers to allow the air to move through the material.
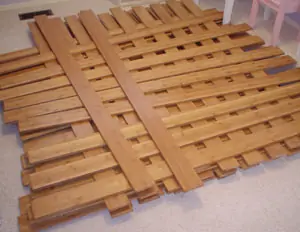
Allow the bamboo boards to acclimate to the environment before installing.
Start with a Clean Subfloor
During installation, the bamboo material is fastened directly to the wooden subfloor, which must be dry and well secured. Remove any old flooring material on the subfloor and clean and sweep the surface thoroughly. To get to the subfloor, we took up two layers of linoleum that spanned four decades, plus a layer of particle board. Be sure to double-check that old nails or staples from previous floor material are removed.
If you have any squeaking spots, nail or screw along the joists. Check that the subfloor is level and make adjustments as needed.
Lay Down Felt Paper
Now that the subfloor is clean and level, position 15-pound felt vapor barrier on top of the subfloor. This is ordinary roofing paper and can be purchased at any home center. The felt helps keep out dust, slows down moisture movement from below, and can help prevent squeaks during the dry season. Most felt paper also has dotted lines to help keep the material straight during the install. We put down the felt in sections as we worked our way around the kitchen.
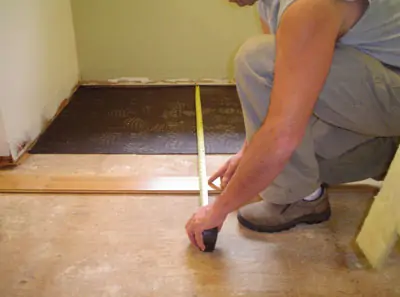
Mark the floor joists with chalk lines to help to guide installation procedure.
Mark the location of floor joists with chalk on the felt paper. The markings will tell you where nails and staples should be placed to make a solid connection withthe subfloor.
Adjust the Air Compression
The main tool you will use for installing a bamboo floor over a wooden subfloor is a floor stapler, which you can rent at any home center for around $30 per day. The stapler, which comes with a rubber mallet that you use to activate the tool, runs off an air compressor and drives the fasteners into the subfloor. One of the most important parts of the stapler is finding the right compression level to use with the material. Too little compression and the staple will not drive into the subfloor far enough. Too much compression and you’ll damage the bamboo.
Before you begin the project, test the stapler with different compression levels on a few pieces to find the right combination. The home center where we rented the stapler said bamboo works best at around 80 psi (pounds per square inch), but we played with the air compression and tried a number of levels before we ended up at just under 100 psi.
Install the Floor
Once the subfloor is clean, the vapor barrier is down, and you have the right air compression for the stapler, you’re ready to start putting down the bamboo boards. The first question to ask is, “how many planks will I need to fill the width of the space?” To find the answer, measure the room and divide by the number of boards. The bamboo we used was 3-3/4-inch wide, so we divided the width of the space by that number and knew we had to trim a few pieces to make them fit. Taking a little width out of a few pieces looks better than having a skinny piece at the end of the space.
Measure the floor and divide by the number of boards.
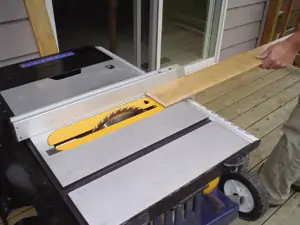
Use a table saw to cut a flooring planks to width.
You want to start the installation process next to an outside wall. An outside wall is usually the straightest and will help with establishing a straight working line. To establish this line, measure an equal distance from the wall at both ends and snap a chalk stripe. Leave about a 5/8 inch of expansion space between the flooring and all walls and vertical objects such as cabinets. You can use a wood or plastic spacers during installation to maintain the expansion space. The baseboard molding will cover the expansion space.
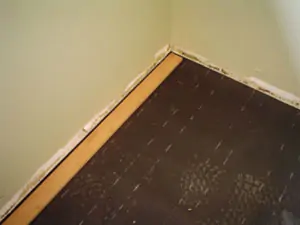
Install the first board at an outside wall.
Place the first row of bamboo along the chalk line. Face nail the first row of boards with a hammer and nail set, or a nail gun, and countersink the nails. The nail holes can be filled later with matching wood putty. Be sure to nail over the floor joists for a stable connection.
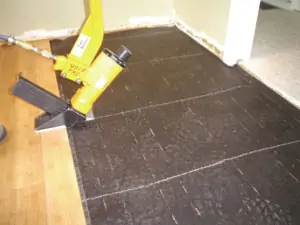
Once the first row is down, set another row and begin using the floor stapler if there is sufficient clearance from the exterior wall. Position the stapler along the board grooves and hit with the stapler mallet. The floor stapler will push the bamboo board into the previous board while inserting a staple at the correct angle through the board’s groove into the floor. Drive staples every 6 to 10 inches and within 2 inches of each end. Be sure to place a staple over the floor joists (this is where the chalk on the felt paper comes in handy). The goal is to get the planks as close together as possible to avoid cracks.
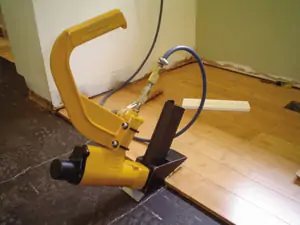
Position the stapler along the board grooves and strike it with the stapler mallet.
Tip: If you’re installing the bamboo floor on a second story, then before you use the stapler first remove light fixtures from the ceilings below. The stapler puts a tremendous amount of force on the joists and can loosen ceiling-mounted fixtures. (We learned the hard way.)
Stagger the Ends
When installing the bamboo, stagger the end joints from row to row so that all the seams are not lined up. This helps make the floor sturdier. We used a full, two-thirds, one-third pattern, meaning the first row started with a full board, the next row started with a two-thirds length board, and the third row started with a one-third length board. This gave a uniform pattern to the design yet kept a random feel that provided strength to the seams.
For hidden areas, such as under refrigerators and dishwashers, cut the bamboo to the appropriate length and install so that the material matches up with the visible pattern.
When you reach the end of the width of the room, you will need to face nail the boards again if there is no space to use the floor stapler.
Finishing Touches
After the last bamboo plank goes down, use wood putty to fill in the face-nail holes and remove any expansion spacers. Install base and or/quarter round moldings to cover the 5/8-inch expansion gap around the perimeter of the room and any transition pieces that may be needed between rooms.
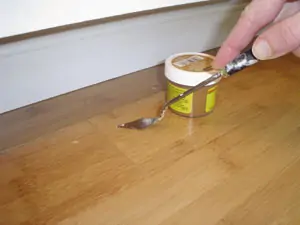
Finish the job by touching up nail holes with wood putty and installing base molding.
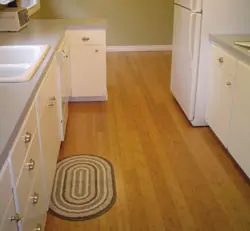
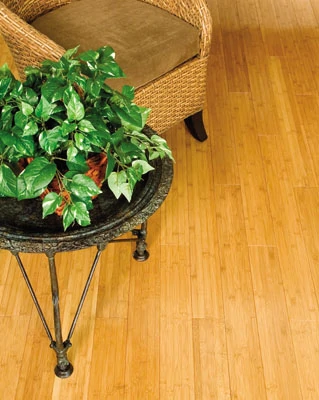
Here’s a look at the completed project.
Care and Feeding of a Bamboo Floor
Once the bamboo floor is installed, follow a few simple steps to keep the floor looking great and ensure the best performance of the product:
• Place floor protectors under the legs of chair and tables.
• Position mats near doors leading outside.
• Clean up any spills immediately. Do not let water stand on the floor surface.
• Clean the floor weekly with a suction vacuum to remove grit and debris from the surface.
• Do not use wax, water or oils soaps to clean the floor. Rather, use a water-based cleaner that will not harm the finish.
Why use Bamboo?
Since its introduction to the U.S. in the late 1980s as a flooring material, bamboo has continued to grow in popularity with homeowners.
“After being relatively unknown in 1989, bamboo is at its highest growth point right now,” says Dan Smith, co-owner of Smith & Fong, makers of Plyboo bamboo flooring.
According to Smith, bamboo appeals to homeowners for many reasons. “People buying bamboo are interested in the story behind the floor,” he says. “It’s still a new and exotic material that has a mystique to it. Plus, the warmth and beauty is appealing. Bamboo looks great.”
The environmental aspect of bamboo also draws consumers to the material. Technically a grass, bamboo is fast-growing and can reach its full trunk diameter in just one growing season. Bamboo can grow up to 4 feet in one day and reach its full height maturity in five or six years.
“There is a good environmental story behind bamboo,” said Smith. “It has the strength of oak and is a completely renewable resource that regenerates quickly. That’s a strong selling point for a lot of people.”
Learn more about bamboo flooring at www.plyboo.com.
