

Enjoy Building Your Own Outdoor Furniture
A place to sit and relax can add greatly to the enjoyment of your backyard, garden or flower beds. A garden bench is one answer and also a fun workshop project. Garden benches, as seen by the examples here, can range from classic designs requiring a fair amount of materials and woodworking expertise to simple slab benches that require little effort, can be built from scrounged materials and add a “rustic” appeal to yards.
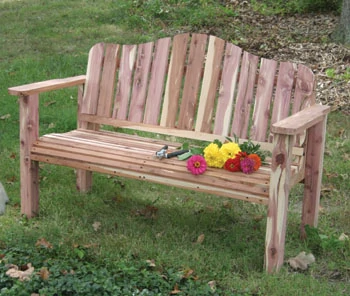
Classic Garden Bench
The classic garden bench is a composite of the many garden benches I’ve built over the years. This bench is constructed of red cedar that was cut, sawn on a TimberKing band saw mill, and cured from our farm. Other good softwoods for the project include redwood, Western white cedar and cypress. The hardwoods, such as oak or ash will also make a classic bench.
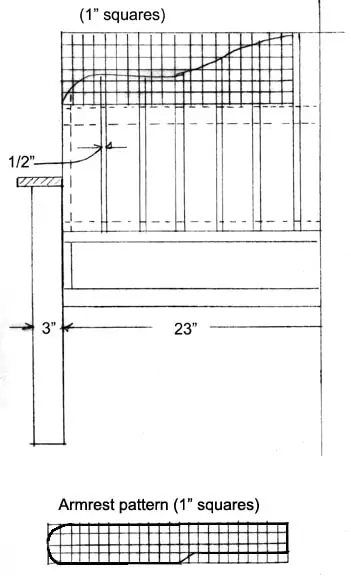
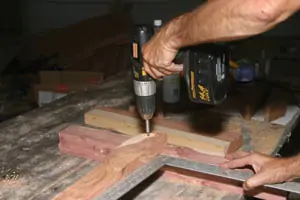
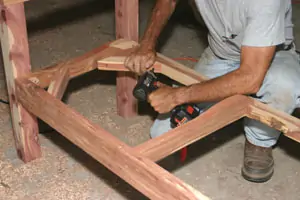
First step is to cut the legs to the correct length. Then cut the seat support pieces to length. Enlarge the squared drawing for the shape of their tops. Transfer this pattern to the stock and cut to shape using a saber saw or band saw. Attach the end seat support pieces to the insides of the legs. Hold a carpenter’s square against the joints and make sure the legs are square with the seat support pieces. Note: Regardless of the species of material being used, all holes should be predrilled and/or countersunk to prevent splitting out the material and to seat the screw heads below the wood surface. The screws can be left exposed or you may wish to countersink them deeper and cut wood plugs to cover. Enlarge the squared drawing for the arm rests. Transfer to the stock and cut to shape. Then fasten the arm rests down on the tops of the legs.
Trace the armrest pattern onto your wood of choice and cut with a band saw.
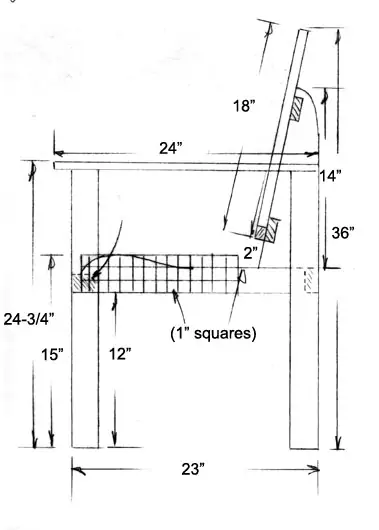
Cut the front and rear seat supports, ripping them to the correct width and cutting to length. Fasten between the leg assemblies. Then cut the center seat support. Note: The center seat support is notched to fit over a front strengthener piece. Cut the strengthener and fit between the leg assemblies, then fasten the center seat support in place. Cut the 45-degree-angle seat braces and install them in place. Then rip the seat slats to the correct widths. Note the first three front slats are 1-inch wide in order to fit over the front curve of the seat supports. The remainder of the slats are1-1/2 inches wide. Fit the seat boards in place, fastening them down to the seat supports.
Cut the back side supports on a band saw. Cut notches in their front edges for the back slat supports. Rip the slat supports and fit them into the notches in the back side supports. Fasten the side supports in place between the back legs. Cut the slats to length and width, and then cut the shaped upper ends on a band saw. Install the slats over the slat supports, spacing them 1/2-inch apart. It’s a good idea to mark all slat locations before installing any slats. If the spaces are not exactly even, you can shift slightly before fastening the slats in place.
Add a coat or two of exterior finish, and you’re ready to enjoy a classic garden bench.
Materials List:
Legs, 3 x 3 x 24”, 4 req’d.
Seat supports, 1-1/2 x 3 x 20-3/4”, 3 req’d.
Arms, 3/4 x 4 x 24”, 2 req’d.
Back seat support, 1-1/2 x 3 x 46”, 1 req’d.
Front seat strengthener, 1-1/2 x 1-1/2 x 46”, 1 req’d.
Seat corner braces, 1-1/2 x 3 x 9”, 4 req’d.
Front seat slats, 3/4 x 1 x 46”, 3 req’d.
Seat slats, 3/4 x 1-1/2 x 46”, 8 req’d.
Seat back side supports, 3/4 x 5 x 14”, 2 req’d.
Back slat supports, 3/4 x 2 x 46”, 2 req’d.
Back slats, 3/4 x 3 x 18”, 13 req’d.
Bottom back slat support, 3/4 x 1 x 46”, 1 req’d.
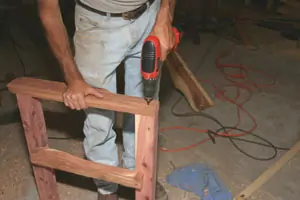
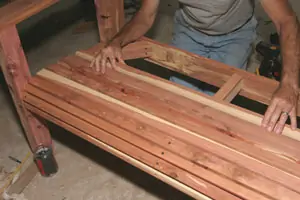
It’s very important to make sure the legs of the “classic” bench are fastened square with the seat supports. Use a carpenter’s square to test for squareness when putting together the leg assemblies.
The bench is assembled with screws. First step is to drill the screw holes and contersink for the screw heads.
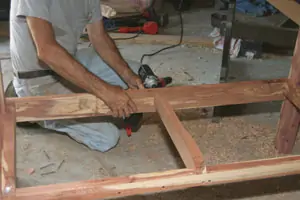
Seat supports are installed between the leg assemblies.
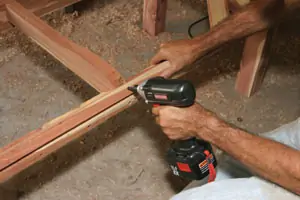
Slats are installed over the seat supports following the front curve of the seat supports.
Corner braces are used to brace and strengthen the seat assembly.
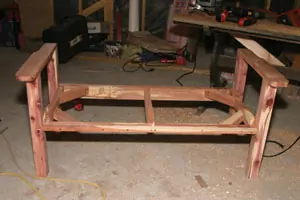
The basic seat and leg assemblies of theclassic bench are ready for the back rest supports.
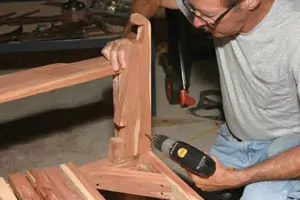
The back rests are fastened to the upper ends of the legs.
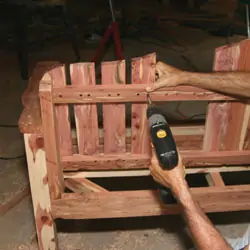
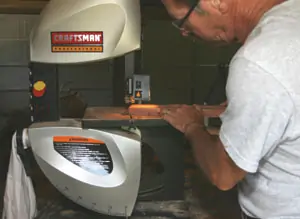
The back slats are cut to the proper shape on a band saw and installed on the upper and lower back slat supports.
Then the seat slats are placed in position on the seat supports, spacing them properly.
Slab Benches
Some of the most novel backyard décor includes benches made of wood slabs. They’re extremely easy to make and add a “rustic” appeal to the backyard. In the olden days, out of necessity, many furniture items were made of slabs and saplings. It’s also a great way these days to utilize sawmill slabs, as well as saplings taken during woodlot thinning operations to build camp- or lodge-style furniture. The furniture created is extremely sturdy in addition to adding a “rustic” flavor. And, construction is easy.
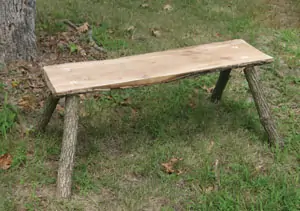
A wood slab-and-sapling bench is easy to make and can create a rustic feel to any backyard decor. The bench show is made of oak slab.
If you have a woodlot, you probably have lots of materials for rustic furniture. Most woodlots benefit from thinning trees, removing dead trees and other timber-management practices. All these management practices can result in materials for rustic furniture. With a chain saw and portable band saw mill, such as the TimberKing, you can acquire all types of building materials. If you don’t have a woodlot, slabs are often free for the asking at sawmills, and tree trimmings or branches may be available from dealers in cordwood.
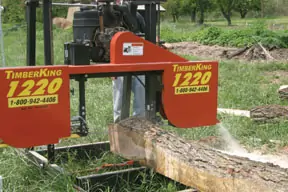
The bench was constricted of red cedar that was cut and sawn on a Timberking bandsaw mill.
The type of woods will vary with availability and locality and may range from oak to cedar to pine to redwood, birch, and cypress. Furniture that is to be left outdoors should be made of redwood, cedar, oak or cypress.
For most construction you’ll need slabs at least 4 feet long and 12 to 18 inches wide. These slabs should be from 3 to 6 inches thick at their thickest part. With some species the bark may be left on, especially for outdoor furniture. However, some species tend to shed their bark, so it’s best to remove the bark in these cases. Cedar is a good example of a wood that looks best with the bark removed.
You will also need saplings for the legs. Again, you’ll have to use wood that is readily available locally. The saplings should range from 2 to 3 inches in diameter for benches. Just about any sapling wood will do. They also don’t have to match the wood used for the slabs and the bark can be left on or removed from the legs as well.
You really don’t need a lot of tools for this project; the furniture can be constructed with simple hand tools. You may wish to use a chainsaw for cutting trees and saplings, as well as for faster cutting of pieces to length. A hand crosscut or buck saw can also be used for cutting the pieces to length. A brace and bits (including an expansive bit), drawknife, spokeshave, hammer or mallet, and jack will build most projects. If you get into large-scale furniture production there are also powered tenoning tools that can be used to cut the round tenons quickly and easily on the ends of the legs, as well as various other power tools to make the jobs easier.
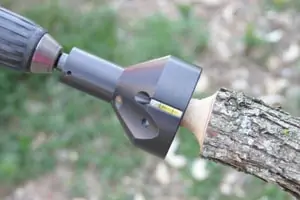
The legs are cut to length from saplings, and then tenons cut on the ends using a tenoning machine in a portable electric drill.
The sawn surface of the slabs may be quite rough, especially if sawn on large circular saw mills. Band saw mills, on the other hand, leave a quite smooth surface. Rough surfaces may need to be smoothed up. The amount of smoothness depends on your desires. The surfaces can be smoothed with the jackplane, or a powered belt sander can be used for initial smoothing, followed by finish sanders if you prefer an extremely smooth surface. The ends should also be smoothed up. The edges and corners should be smoothed and rounded. Then inspect the entire piece for any splinters or sharp edges. Some extremely rough bark may also need to be smoothed slightly with the drawknife or spokeshave. Try to use sapling sections without knots or bumps. If they do have knots or bumps, cut them flush or smooth them up. Inspect the saplings to make sure there are no sharp bumps or knots.
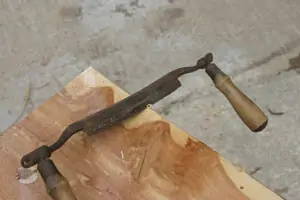
Round the edges of the bench with a drawknife.
Determine the length of the legs. In this type of furniture, the legs are usually placed at an angle and this requires slightly longer lengths. The next step is to determine the diameter of the tenons. A 1-inch diameter is a good starting point. Once you’ve decided on the diameter, set the expansive bit to the correct size and bore the holes for the legs. Make sure to keep the angles the same for all four legs. The easiest way of doing this is with an angle-boring jig. This allows you to ensure correct and consistent angles on all holes. The angle should be between 15 and 20 degrees in two directions. Using the drawknife, and with the leg clamped in a vise or other type of clamp, shape the end of the leg into a round tenon that will fit snugly into the hole. Tenons are quickly and easily cut with a tenon making tool from Woodcraft Supply or Bosworth Tools. The tools fit in a portable electric drill.
The ends of the tenons and wedge are cut flush with the bench top.
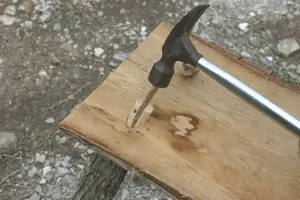
Slots are cut in the top of the tenons and the tenons driven into the holes. Wedges are then cut to fit into the slots and driven in place.
Tenons may be fastened in place in one of three ways. If the wood is seasoned, which it rarely is in this type of construction, you can glue the tenons in place. Or you can drive a nail in at an angle to hold the tenons. The more traditional and best method, however, is to anchor the tenons in place with a wedge. Bore a hole for the tenon all the way through the slab. Cut the tenon long enough so about 1/2 inch protrudes through the top of the slab. Cut a slot in the top of the tenon, and drive the tenon in place in the hole. Then drive a wedge in the tenon from the top of the slab. Once the leg is wedged tightly in place, cut off the end of the tenon and wedge it flush with the top of the slab. Then sand or plane the slab to smooth the joints. As most of this type of furniture is made of green wood, it will eventually shrink and the legs become loose. To retighten, simply drive in another wedge or a larger wedge. On thick slabs a pin can be used to hold the tenons in place.
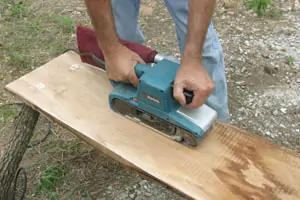
The bench top along with the tenons and wedges are then sanded smooth.
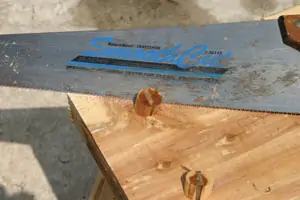
Once the bench or stool is assembled, place it on a flat, smooth surface. You’ll discover it probably doesn’t sit flat. Use small pieces of wood to wedge the shorter legs until the furniture piece sits flat and level. Mark the amount needed to be removed from a leg or legs to create a level surface. Mark all around the leg so you can cut the leg flat or you’ll end up continually cutting. With the piece on its side, saw the legs to the correct length.
