Time after time William Moulton faces the same problem: ugly interior plaster walls that he’s charged with fixing. Molton, a professional remodeler and owner of Better Built Construction, often spruces up the walls with a sheetrock overlay, but many times he needs to retain the textured look of the original plaster. If the original plaster is in good structural shape, meaning it is still bonded to the lath boards, then repairing small cracks and cosmetic damage can be done with a coat of lightweight gypsum plaster.
Prior to applying the plaster, inspect the walls for visible cracks. To better cover the cracks with plaster, use a 1/4-inch grinder wheel in a drill chuck to grind the cracks open wider. This allows more available surface area for the new plaster to bond to, ensuring better coverage in the long run.
Moulton usually uses a plaster called Structo-Lite from the USG Corporation. Structo-Lite is a premixed perlite-aggregate gypsum plaster. Because it’s mill-mixed with aggregate, it requires only adding water at the jobsite and then you’re ready to apply it to the walls. Once mixed, you have a lightweight, plastic gypsum plaster that will conform to various shapes and designs in the wall surface, providing more durability in walls and ceilings.
“I’ve been using this plaster long enough that I just mix it where it feels right for me. It mixes just like concrete,” says Moulton, who uses a drill attachment to mix a bucket of plaster at the site. “I know I’m going to want a pretty fine finish, so I don’t mix it too thick.” The lightweight nature of the Structo-Lite, which weighs less than half as much as sanded plaster, makes a fine, but workable consistency easier to achieve.

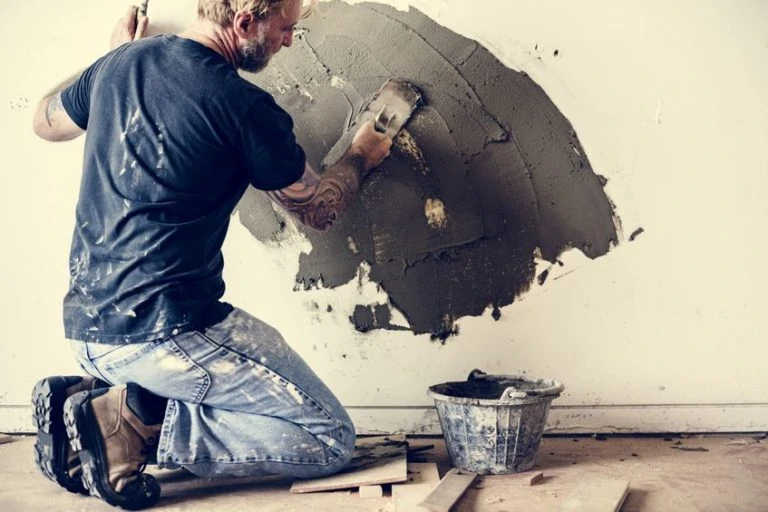
Once mixed, load some plaster onto a hawk (a flat, hand-held pan) and use a steel masonry trowel to apply the basecoat. Moulton uses a 16-inch metal trowel, working it in broad arches to evenly distribute the plaster over the surface. Work from one corner outward, covering the entire wall. Apply the first coat with sufficient material and pressure to form a good bond to the base, and then double-back to level the thickness. Leave the first coat rough to receive the finish coat.
For the finish coat, use a smaller plastic trowel. The edges of a plastic trowel won’t cut into the plaster as easily as the metal, making it easier to achieve a smoother, more uniform finish. Plaster used for the finish coat should be mixed with additional water to provide a thinner mix and a finer topcoat. On this final coat, Moulton moves the trowel in small, circular motions to achieve a “chicken scratch” texture in the surface of the wall.


“Chicken scratch” is what Moulton calls his style of finish, referring to the pattern of small dips and bumps in the final texture of the plaster. While not a technical term, he notes that anyone who applies plaster will have a style of their own, whether or not they realize it. It boils down to the way they hold or work the trowel — everyone instinctively has a personal style. For this reason, he suggests only one installer work on a single wall. If one person starts in one corner, and another installer starts in the opposite corner of the same wall, the texture very likely won’t match where the coats meet in the middle.
Once the finish coat is applied, allow the plaster to dry completely. Use a broom to brush over the dried plaster surface to remove any loose debris prior to priming and painting.